iOS Behaviours
Behaviour, as definiton, the way in which a machine or natural phenomenon works or functions. Behaviours in programming can be expressed as an object which is responsible for a specific task. In this article, I am going to explain how to use behaviours in Interface Builder, how to extract functionality from view controller implementation and reuse the code anywhere else.
Simple Example
A behaviour can be simple any function you have, which you want to separate from the basic application logic. For instance picking an image from Library and Camera can be a behaviour. A transition effect can be a behaviour. We will create an example which demonstrates a toggle button behaviour. Here are the requirements:
- Our Toggle behaviour needs two states: Active - Passive, Selected - Nonselected etc.
- We want to specify two different button images for these two states respectively.
- Our behaviour should detect the touch events and must change the button image according to the buttons current state.
- This behaviour will be available only through Interface Builder.
Let’s start creating an empty behaviour in Interface Builder. We assume we are using storyboards, but indeed, there is no difference between .xib files and a storyboard within the aspect of behaviors. It is almost same to use behaviours in both storyboards and .xib files. I picked storyboards for this article.
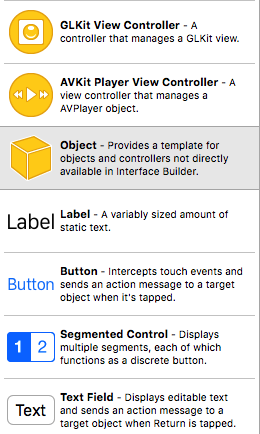
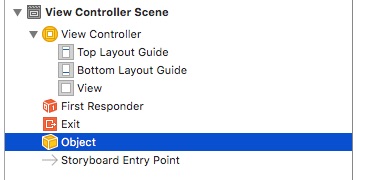
We have our Main.storyboard file open, expanded the default scene which is ViewControllerScene. At this point we are going to add an Object component to our scene, just like we are adding a UILabel or UIButton.
Here is how our ViewControllerScene now looks
Now it is time to create our behaviour. First we will create a generic Behaviour object, which is responsible to cover all common functions a behaviour should have.
@interface Behaviour : NSObject

//! object that this controller life will be bound to
@property(nonatomic, weak) IBOutlet id owner;

@end
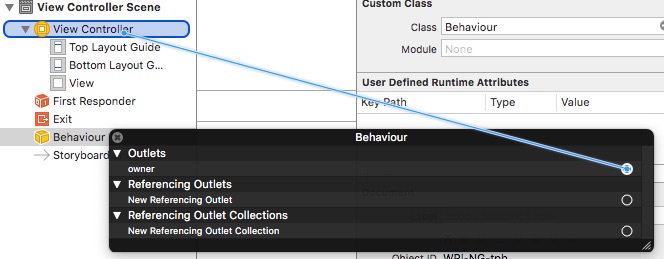
Interface is really simple, but the owner property has a meaning deeper than it seems. The property owner actually defines the lifetime of the behaviour, which can be a view, view controller or any other object in the scene.
Once we link the owner property in the ViewControllerScene , we are actually creating a property
at runtime on the linked object (view or view controller in our case), and have a strong relationship between the linked object and our behaviour. Let the code express itself:
@implementation Behaviour

- (void)setOwner:(id)owner
{
    if (_owner != owner) {
        [self releaseLifetimeFromObject:_owner];
        _owner = owner;
        [self bindLifetimeToObject:_owner];
    }
}

- (void)bindLifetimeToObject:(id)object
{
    objc_setAssociatedObject(object, (__bridge void *)self, self, OBJC_ASSOCIATION_RETAIN_NONATOMIC);
}

- (void)releaseLifetimeFromObject:(id)object
{
    objc_setAssociatedObject(object, (__bridge void *)self, nil, OBJC_ASSOCIATION_RETAIN_NONATOMIC);
}

@end
This is actually the same as we have a property in our view controller:
#import "Behaviour.h"

@interface ViewController : UIViewController

@property (nonatomic,weak) IBOutlet Behaviour *behaviour;

@end
Instead, we are doing this at runtime, because we do not want to messup with the code in view controller. We just want to manage things in Interface Builder. This approach is called Reverse Lifetime Binding. For more detail on this approach, you can read the article from Krzysztof Zabłocki
Next, we are going to link the owner property of our behaviour.
In order to test the lifecycle of the behaviour, we add log for -awakeFromNib and -dealloc methods of our behaviour and present/dismiss the linked view controller:
@implementation Behaviour
.
.
.
-(void)awakeFromNib
{
    [super awakeFromNib];

    NSLog(@"Created %@",NSStringFromClass([self class]));
}

-(void)dealloc
{
    NSLog(@"Dealloc %@",NSStringFromClass([self class]));
}

@end
Logs shown that we successfully allocate and release the behaviour object:
2016-05-30 14:30:18.616 Behaviours[2315:2113885] Created Behaviour
2016-05-30 14:30:19.121 Behaviours[2315:2113885] View Controller presented
2016-05-30 14:30:21.122 Behaviours[2315:2113885] View Controller dismissed
2016-05-30 14:30:21.122 Behaviours[2315:2113885] Dealloc Behaviour
Toggle Button Behaviour
As we already have a generic behaviour implementation, we start adding our Toggle behaviour. First create a class named ToggleButtonBehaviour, subclass of the Behaviour.
@interface ToggleButtonBehaviour : Behaviour

/**
 *  The button, which the behaviour will be applied to
 */
@property(nonatomic, weak) IBOutlet UIButton *button;

/**
 *  UIImage reference for normal state
 */
@property (nonatomic,strong) IBInspectable UIImage *normalImage;


/**
 *  UIImage reference for selected state
 */
@property (nonatomic,strong) IBInspectable UIImage *selectedImage;


/**
 *  Toggle state for the button
 */
@property (nonatomic,assign) BOOL toggled;

@end
Next, we will link these IBOutlets:
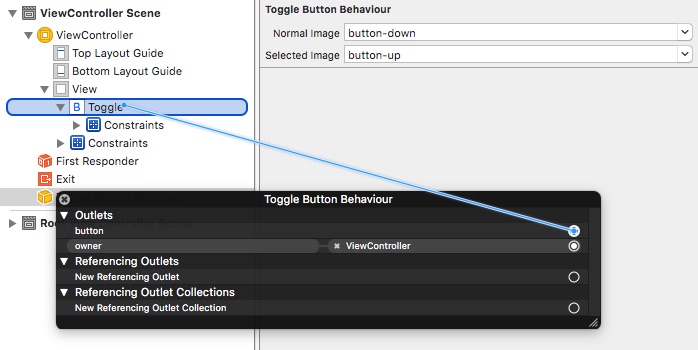
Notice that we specified two UIImage references with the help of IBInspectable, which are displayed according to the toggled state of the behaviour.
Here is the implementation of ToggleButtonBehaviour :
@implementation ToggleButtonBehaviour

-(void)setButton:(UIButton *)button
{
    _button = button;
    [self configureButton:button];
}


-(void)configureButton:(UIButton *)button
{
    // Middleware actions
    [button removeTarget:self   action:@selector(buttonTap:) forControlEvents:UIControlEventTouchUpInside];
    [button addTarget:self      action:@selector(buttonTap:) forControlEvents:UIControlEventTouchUpInside];

    self.toggled = NO;
    [self reverseImages:button];
}

-(void)buttonTap:(UIButton *)button
{
    self.toggled = !self.toggled;
    [self reverseImages:button];
}

-(void)reverseImages:(UIButton *)button
{
    if (!self.toggled) {
        [button setImage:self.normalImage       forState:UIControlStateNormal];
    }
    else{
        [button setImage:self.selectedImage     forState:UIControlStateNormal];
    }
}

@end
Let’s explain it step by step.
-
Once the link between behaviour and its
buttonIBOutlet, we call-configureButton:method, to add a middleware action for button, and set the initial image. -
Everytime the button is tapped, we change the state
toggled, and refresh the button’s image due to thetoggled.
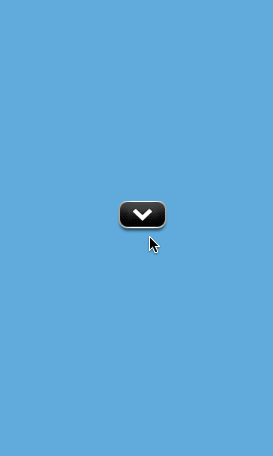
Here is the result:
Go ahead and change the images, or move the behaviour to another scene, link to another UIButton. As long as you properly linked the behaviour, it works exactly as you defined.
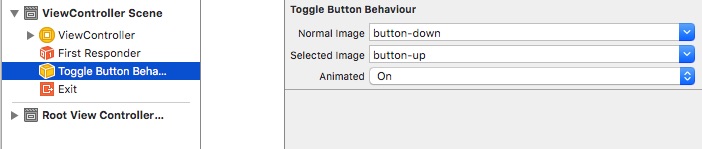
Let’s make things little bit fancy. We add another property for our behaviour, animated, which is also Inspectable, controls whether the change the images of button displayed with a fade-in, fade-out animation.
We add the animated property:
@interface ToggleButtonBehaviour : Behaviour
.
.
.

@property (nonatomic,assign) IBInspectable BOOL animated;

@end
Now we have the UI in Interface Builder for this flag:
And modify the -reverseImages: as follows:
@interface ToggleButtonBehaviour : Behaviour
.
.
.

-(void)reverseImages:(UIButton *)button
{
    if (self.animated) {
        [self reverseAnimatedImages:button];
    }
    else
    {
        UIImage *targetImage = !self.toggled ? self.normalImage : self.selectedImage;
        [button setImage:targetImage forState:UIControlStateNormal];
    }
}

-(void)reverseAnimatedImages:(UIButton *)button
{
    UIImage *targetImage = !self.toggled ? self.normalImage : self.selectedImage;

    [UIView animateWithDuration:0.7 animations:^{
        button.alpha = 0.0;
    } completion:^(BOOL finished) {

        [button setImage:targetImage forState:UIControlStateNormal];

        [UIView animateWithDuration:0.7 animations:^{
            button.alpha = 1.0;
        } completion:^(BOOL finished) {

            button.alpha = 1.0;
        }];
    }];
}

@end
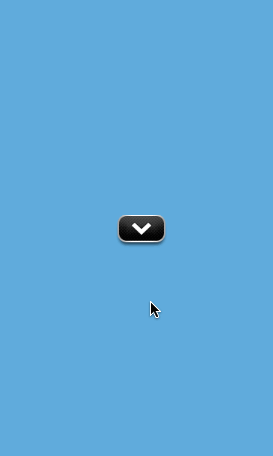
When the animated property is false, images will swapped as before. If it is true, there will be a fade-in, fade-out animation during the change:
Why Behaviours
You do not have to use behaviours everywhere, but there are certainly good reasons to use them.
First, we will split up the code from view controller. As we are opposed to Massive View Controller, we should decouple and reuse as much code as we can. When you get used to have behaviours in your view controller, you end up with lighter view controllers.
You can reuse the behaviour you create. In the above example, we can copy that behaviour in any scene, link the button and owner property, and go on. Moreover, you can easily extend the behaviour to add another functionality, swap the behaviours between scenes, even concatenate them. This pattern gives us more flexibility and reusability.
Because your behaviour code not attached to any other code, you can easily write unit tests for it. It is very hard when compared the code in the view controller.
For more example of behaviours, please read the detailed article.